Aple's Raycast Tutorial
Aple
Contributor
18 min read
Hey divas! Welcome to my tutorial. Here, you will see my workflow and how I get my videos from the image on the top to the image on the bottom. Let’s get this started!
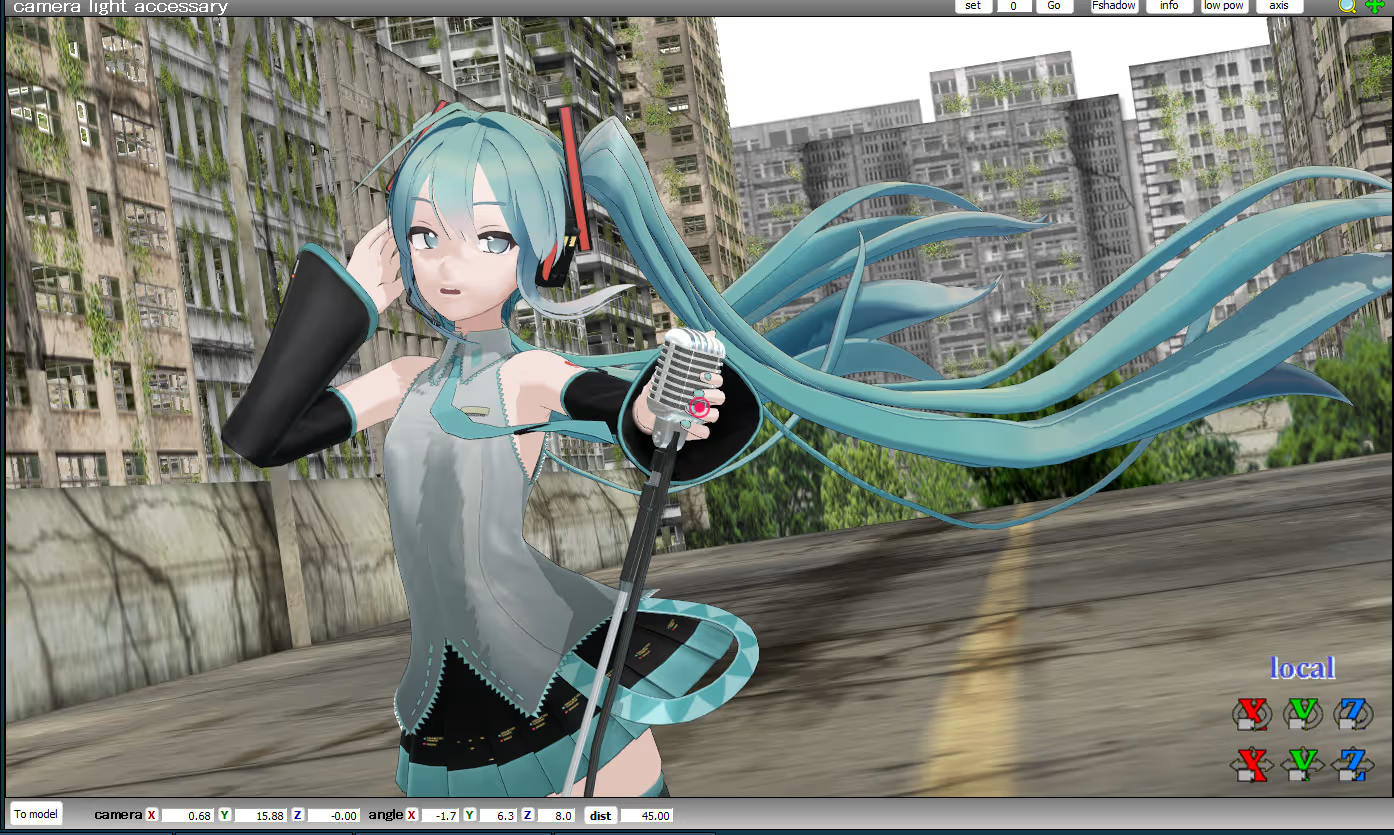
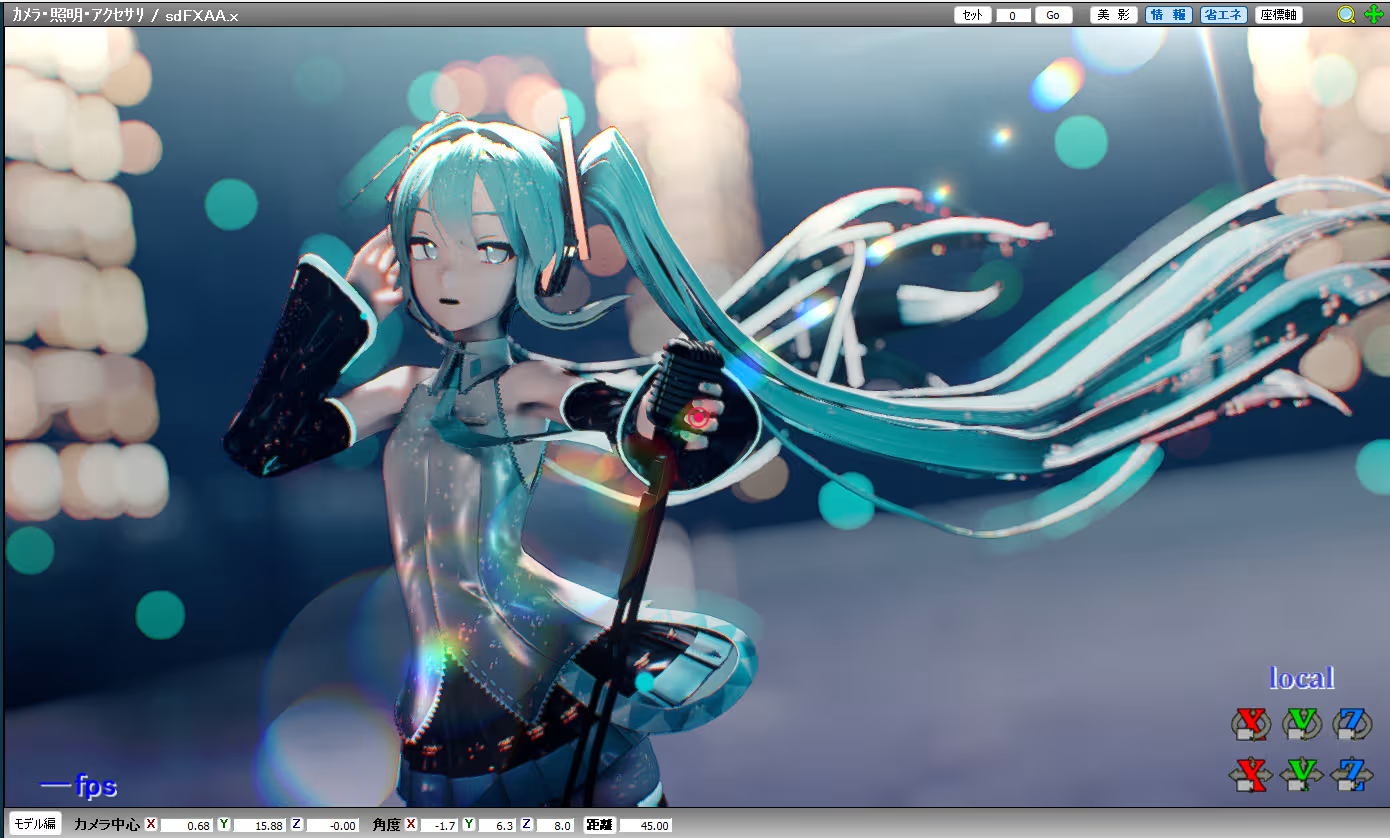
Step 1: Planning
Probably one of the most crucial steps in a video by far. This may seem like a “duh,” but trust me—you need to think carefully about how you want your video to look and what fits your vision. Every detail matters, down to even the song you use. My order of planning goes as follows:
Song Motion & Camera
Video Video
Model
Stage & Overall Scene
I usually try to have everything fit the vibes of the song i get. for example, my video with haruna uses the song “märchen star,”, which gave me a dreamy vibe. this in turn caused me to make my scene look more fantasy-like. my video with miku uses the song “プレイ,” which gave me a futuristic vibe from it. i recommend looking at images on pinterest so you can get the feel of what you want.
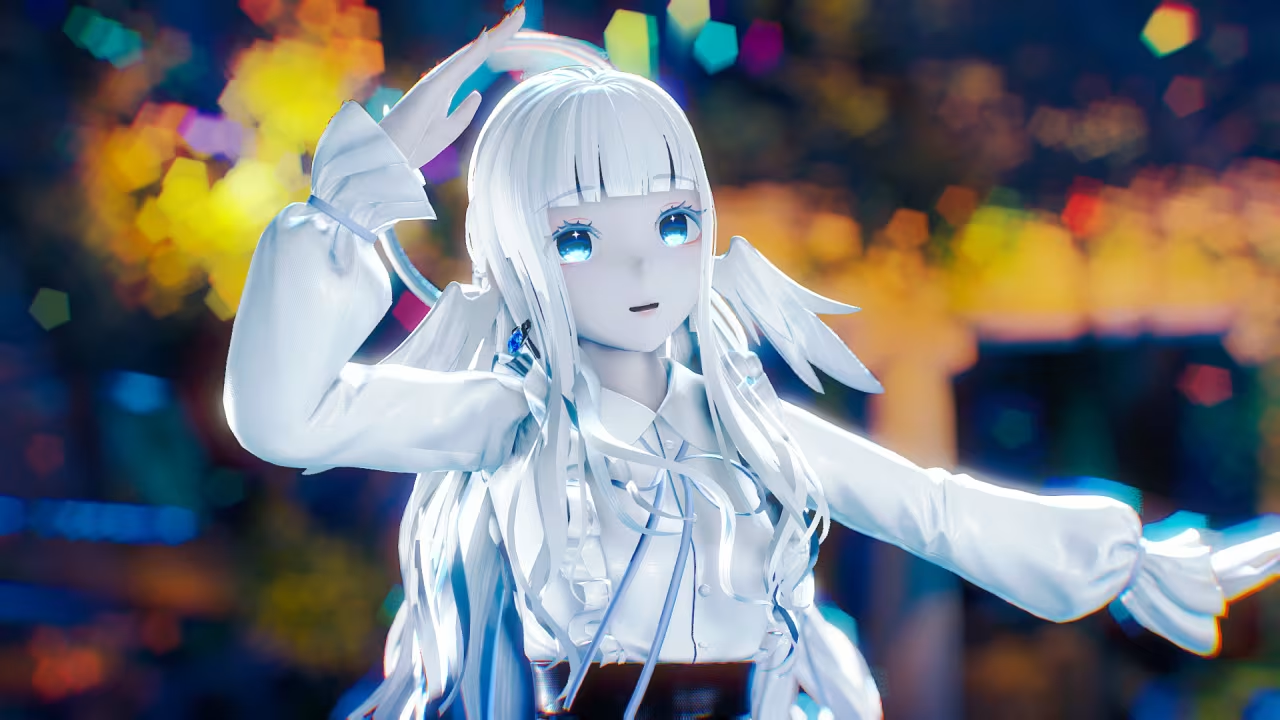
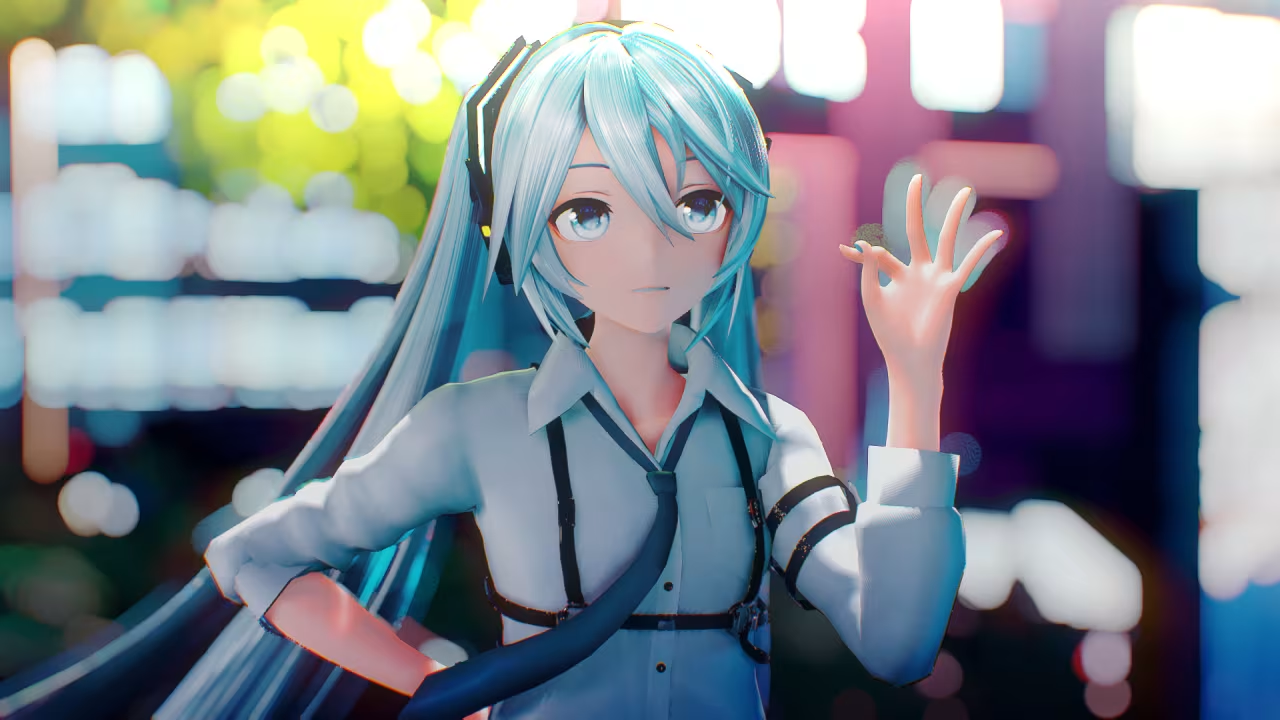
You don’t have to follow my workflow. remember that in the end, it’s your video. you get to decide on what you want there.
Step 2: Building the Scene
This part is the most time consuming part, but mainly because I heavily overthink things lol. I kid you not, I can find a model that fits perfectly, but then it’s the stage that gives me a stroke. Sometimes it’s the other way around. Normally, MMD creators such as Laine or Dendewa use Blender stages and port it themselves "not Laine, he makes other people port it for him". However, I’m assuming that you don’t know how to do that, so you’ll probably be relying on Aplaybox or BowlRoll. There isn’t really a set way on how to do it other than just throwing things in your scene and moving it until it looks good. Remember that your scene shouldn’t look really busy if you want your viewer to focus on your models, so be cautious when building it up.
Note: When loading in the motions, I normally load it at frame 1 so frame 0 can be the “test” frame for me to set everything up. Remember to have the start frame at 1 when rendering.
Step 3: Effects
This is what will make and break your video, so lock in on this part. I’ll split what I do into subparts for easy navigation.
Main Shader
Nothing really crazy to say about this one. I called it the main shader because you may use this for something like MStoonCoordinator or like SDPBR. You load it in like normal with all the pre-requisites needed for it to work. For this tutorial, I’ll be talking as if you are using Raycast.
Configuring Your Shader
Most of the time, your shader will have a config file that you can edit so your shader can look a certain way. Additionally, there are Raycast mods out there that can change the look of it. I normally use a lot of mods for my Raycast, as well as editing some parts of the code. However, you can just edit your ray.conf file to how you please.
SUN_LIGHT_ENABLE
This is how your sunlight will work. The base value is 1, meaning that it is enabled. I have it set to 2, which is "sun radiance calculated from solar zenith angle." This basically means that the sunlight will change color and intensity based on how high or low the sun is in the sky. If you want your sunlight to be constant, keep it at 1.
SUN_SHADOW_QUALITY
This changes the quality of your sun shadows. Think of it like the self shadow manipulation slider in MMD. Normally, it is set to 3. I keep it at 3 since anything higher will be putting significant work on your CPU. If your computer is struggling very hard, lower the number until you can handle it. Do not set it to 0, you will be getting rid of your sun shadow.
IBL_QUALITY
Image based lighting is a 3D rendering technique that uses a panoramic image "in this case your skybox" to light and reflect your scene. You can’t turn this off at all. The base value is at 1, but you can set it to 2 if you want the UV to be flipped.
FOG_ENABLE
Self explanatory, this controls if the fog is enabled or disabled. It is enabled by default.
MULTI_LIGHT_ENABLE
Also self explanatory, this controls the lights on your scene. It is enabled by default.
OUTLINE_QUALITY
This controls the outlines of your models. By default, it is disabled. However, you can enable it with different anti-aliasing effects added onto it. I normally set it to 3 just in case I want to use it with the toon materials "foreshadowing". If you want it on but don’t want to see it in your scene, you can either change the edge line of your model through MMD, or turn it off in the outline tab in MME.
TOON_ENABLE
This enables or disables toon material support. It is disabled by default but can be turned on. There are two options when turning it on: one without diffusion 1 and one with diffusion 2. Do not set it to 2, it will screw up effects like kirakira.
SSDO_QUALITY
Screen space directional occlusion is a 3D graphic technique that improves upon screen space ambient occlusion by considering the direction of incoming light. This creates softer shadows and depth at the cost of increased computational power. By default, it is set to 2, which is 12 samples. I normally beef it up to the highest setting.
SSR_QUALITY
Screen space reflection is a 3D rendering technique that calculates information from what is visible on screen and uses it to make realistic reflections. By default, it is disabled. I normally set it to its highest setting and edit another file to beef it up to 256 samples. You can find it in shader/postprocessssr.fxsub, and edit the ssr_sampler_count to be a multiple of 2.
SSSS_QUALITY
Screen space subsurface scattering is a 3D rendering technique that simulates light penetrating and scattering within translucent materials by applying a specialized blur to the image in screen space. This can help make materials like skin, leaves, or wax not look like hard plastic. It is enabled by default.
BOKEH_QUALITY
Bokeh and depth of field are two things that work together. Bokeh is the aesthetic quality of the blur in out-of-focus areas of a photo, while depth of field is the range of distance in an image that appears acceptably sharp. It is disabled by default but can be enabled if you want the classic hexagonal bokeh that you see in a lot of famous MMD Raycast videos. I usually keep it off in favor of using a DOF effect that I can have more control over.
HDR_EYE_ADAPTION
Eye adaptation is the process by which the human eye adjusts to varying, extreme levels of light, enabling clear vision in both bright sunlight and dark environments. In Raycast, this will darken or lighten your scene depending on how it looks. It is disabled by default.
HDR_BLOOM_MODE
Bloom is a 3D post-processing technique that simulates the light-bleeding, hazy glow produced by real-world camera lenses when capturing intense light sources. It is enabled by default with a value of 4. All the values lower are just for compatibility with older versions of Raycast.
BOKEH_QUALITY
Lens flare is an optical effect in photography and film where strong light enters a lens at an angle, scattering and reflecting off internal glass elements. It creates artifacts like bright streaks, circles, or a hazy wash that can reduce contrast. It is disabled by default but can be enabled with different color options. I normally keep it off since it can bring unwanted visuals to my video.
HDR_STAR_MODE
Glare stars, also known as just glare, is a 3D post-processing effect that simulates the visual artifact created when very bright light sources shine into a camera lens. It creates a star-shaped, multi-pointed, or streaking light effect radiating from the bright spot. It is disabled by default but can be enabled with different options. Anamorphic lens flares are one of the options that create horizontal, streak-like light artifacts when hit by bright light sources.
HDR_TONEMAP_OPERATOR
Tone mapping is a technique that adjusts the brightness and contrast of an image. There are multiple options you can choose from, but it is defaulted to Hejl2015. If you have Dendewa’s tonemaps, you can have more options. I normally use the Unreal tonemap from Dendewa’s mod.
AA_QUALITY
Anti-aliasing is a computer graphics technique that smooths jagged, “staircase” edges on curves and diagonals in digital images. There are multiple techniques that can be used with varying levels of quality and performance. The default is FXAA, which is the fastest technique for it, but you can set it to be SMAA with different levels of quality. I keep it the same since I use a post effect for it.
POST_DISPRESION_MODE
Dispersion means to scatter or spread out. In simpler terms, RGB channels get moved, making it like a chromatic aberration effect in a way. By default, it is set to 1, which is color shift. I normally set it to chromatic aberration, which is 2.
Lighting
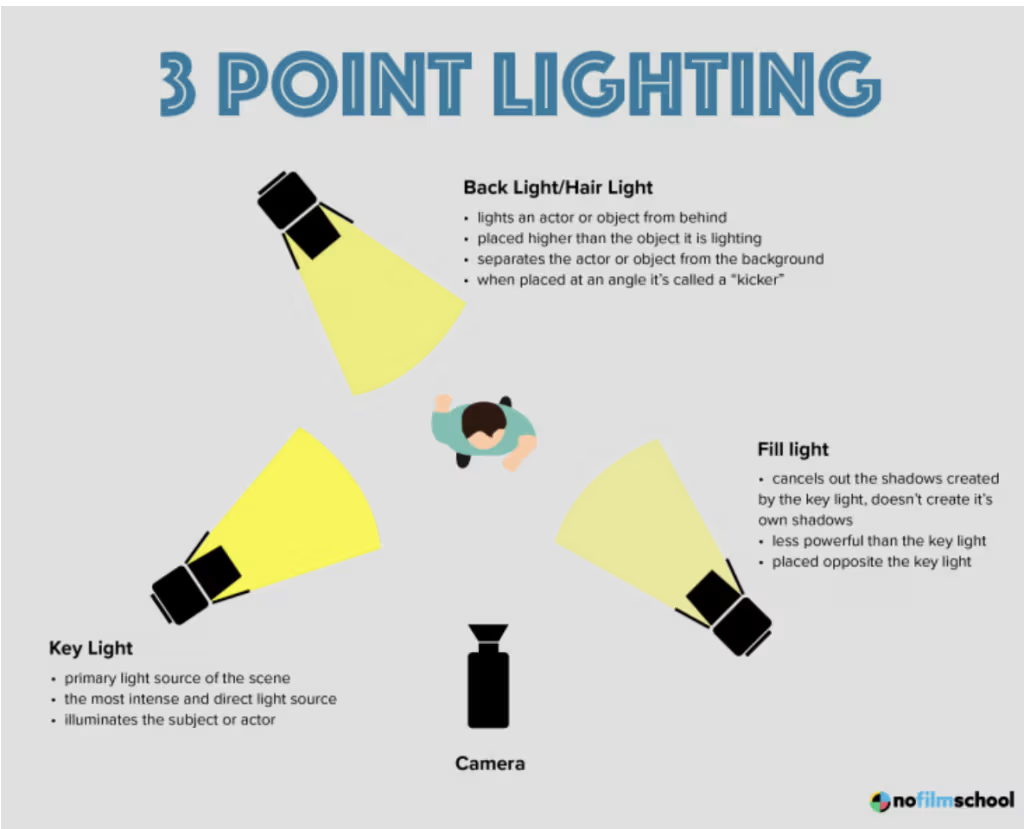
There are multiple methods when it comes to getting the lighting you want. There is no “definitive” answer to getting the lighting you want, and it’s all up to personal preference. For example, if you are into more flatter shading, then you would go for DirectionalLight. If you want more prominent shadows, you would use a three-point lighting setup with spotlights. This is where you can have more control with the colors of your scene depending on the vibe you want.
In my videos, I use a lot of spotlights in my scene that kinda works like a three-point lighting setup. I then parent it to a lightbone for it to follow the model. My lightbone has multiple bones corresponding to the motherbone, groove bone, and center bone. The motion that you use for your video is loaded onto it with the rotation removed and optionally the Y move values removed. My lighting mainly consists of a base lighting consisting of a color I want, a side lighting with a color that makes my model look not as boring, and a bright back lighting.
Materials
Materials are my joy of making a video, especially on the model. Loading it on and watching it turn from a bleak, plain model to one with depth and dimension brings me joy. I usually make my own materials when there isn’t one I can use. There are multiple tutorials out there that can help you with making it, but when making the map files, I recommend ShaderMap since it gives you normal, specular, and displacement maps based on the image you choose.
When inputting materials, there are some parts of the models I have set materials for. One example is the eyes of the model. I normally have the iris have an emissive of 0.3~0.5, the highlights at the regular 1x emissive, and the scleras at an emissive of 0.3. When making certain materials emissive, like LED lights on the model, I usually use some sphere lights or point lights to make those parts feel like they are actually glowing.
Fog
Fog helps make sure your model is the focal point. I normally use volumetricsphere with a range above 3 and intensity at around 0.8~1.0. Normally, it’s a dark color or pitch black. Just adjust it to how you see fit. If you aren’t using Raycast, you can use an effect like iksunshaft to get a similar effect.
Color Grading
This is where I add in effects like ikclut. I normally use ikclut_rc by RedialC and DDLL 2.4 by Dendewa. I use a lot of these and change the transparency of it. After loading them in, I edit things like the lighting to fit my vision even more. You can also use the Ray Controller to edit the colors of your video. There is also a color grading effect from Rui, but from what I’ve seen, it doesn’t work for me. Again, there is no definitive “best practice” on what colors you should do for your videos, because that will vary from scene to scene. It’s best to look at moodboards based on your vibe to get the feel that you want, or look at photography based on your scene.
Other Scenic Effects
I normally add this when I have everything set up due to how heavy some of the effects can be. There are multiple effects you can choose from that can fit your video. Some that I recommend are kirakira, fireflies_spectrum, and ikparticles. Play around with what fits your video.
Depth of Field
You can skip this step if you use the built-in Raycast depth of field. However, I recommend using ikbokeh since, again, having more control is key. I recommend parenting the .x file to the model’s head bone and turning the front bokeh and emphasis sliders all the way up in the controller. If you have multiple models, it will be more difficult to control it, but whatever model is the main view/focus will have the .x file parented to them. That will change for each camera shift.
Motion Blur
Motion blur is put here because it’ll look off if it’s put anywhere else. I normally use a mod of MotionBlur by Ikeno since it has an effect that makes static objects only get affected by the camera movement. This can be good for high poly models since MotionBlur cannot handle that well. Depending on the frame rate you use, you’ll have to edit the size of the .x file to how you see fit. Higher frame rates would demand a bigger size, while smaller frame rates would demand a smaller size. I normally keep it at its default settings since it works well with my frame rate.
Bloom
I use bloom to add more of a glowing feel for bright areas. It is best practice to not set the threshold to anything that is really high, since it can make everything look blurry and washed out in a way. However, if the scene needs that dreamy feel, you can do that. Again, play around with the intensity of the bloom.
More Color Effects
This is where I use effects like msgradation for my video. I normally use a dark blue at the bottom and a light yellow at the top. Play around with it to get the feel you want, since you have three different gradation .x files you can use.
Lens Flare
I really like lens flares when it’s needed. I normally use the OpticalFlares “sun flare circle bokeh 1” effect and use either the “by sun” file if the sun is visible in my scene, or the “by bone” file if there is a lighting I like but I want to make it seem like the sun is behind the model. Again, there are multiple files you can play around with to get what you want. If you want to change the transparency of the model, change the size of the .x file.
Final Post Processing Effects
This is where I add effects like unsharpmask and anti-aliasing. If there are any other visuals I want to add that affect things like color, noise, lines, grain, etc., I’ll add them at this time. I usually add sdfxaa, unsharpmask, and then sdfxaa again. You don’t have to do this, but I personally like it. This will also be the time to adjust all the other effects if something doesn’t fit your taste.
Step 4: Quality Checking
This is the part where you need to really lock in and make sure there isn’t anything you don’t want to see. This is also the part where you will hide stuff in the MME window. Hide every light model in every tab but the lightmap tab. Hide every controller in all tabs. Be sure that anything you don’t want affected by the depth of field and motion blur is hidden in those tabs too. They will show up in the final render if not hidden, and it will look bad. Remember that you gotta double check, triple check that you like how it looks, because rendering will take a lot of time.
Step 5: Rendering
You are on the final stretch! Decide on what you want your video size and frame rate to be. Normally, I use 1920x1080 with 30fps, but sometimes I’ll use 2560x1080 if needed "i.e. collabs". Choose what you want based on your computational power and patience. A 1920x1080 video takes about an hour or less for me, while a 2560x1080 takes around 2~3 hours. Choose what you can handle.
Final
And there you have it! You now have an MMD video. Remember that there are multiple tutorials out there, and you can pick and choose techniques that you personally like. Play around with effects, lighting, and color until you get something that you like. I will be listing some resources you can use that can help with your video making journey. Happy MMDing!
Resources
DENDEWA LAB - Everything that dendewa made has been moved in here and serves as his repository.
LightingMask by 三金络合物 - Allows for more control of the lights. When using this, you can set specific lights to affect certain models.
Ikbokeh_v020a_sj by 三金络合物 - An ikbokeh edit that brings sharper and brighter emphasis to the background. You can even set the aperture blades to change the shape of the bokeh. This is great if you want a Raycast bokeh replacement but want to keep the hexagonal bokeh.
Ray emissive through transparent by thesodawave - When putting a transparent material in front of an emissive material, it will invert the colors. This fixes the issue.
Better shadow ver. Ray and Best Quality SSR Ray (aka Ray-MMD modern ver) by 给你柠檬椰果养乐多你会跟我玩吗 - Edits Raycast’s code to give better shadows and SSR.
Ray-MMD SSR material/shader edit by Reona - Edits Raycast’s code to give you a better quality SSR. This also gives you a material that is very reflective.